Using an Azure Database for PostgreSQL server with RedwoodJS
Intro
I had several titles in mind for this post:
- Adding the A to RedwoodJS-style RPG (React, Prisma, GraphQL) with Azure 🛡 (going to pin this one in a corner, just in case)
- Taking the RedwoodJS tutorial wheels off and using an Azure database 🚲
- RedwoodJS 🤝 Azure PostgreSQL
- Setting up a database with RedwoodJS for noobs: Azure PostgreSQL edition 🐤
… And yet, I settled with the most boring one. At least you know what to expect.
What is RedwoodJS?
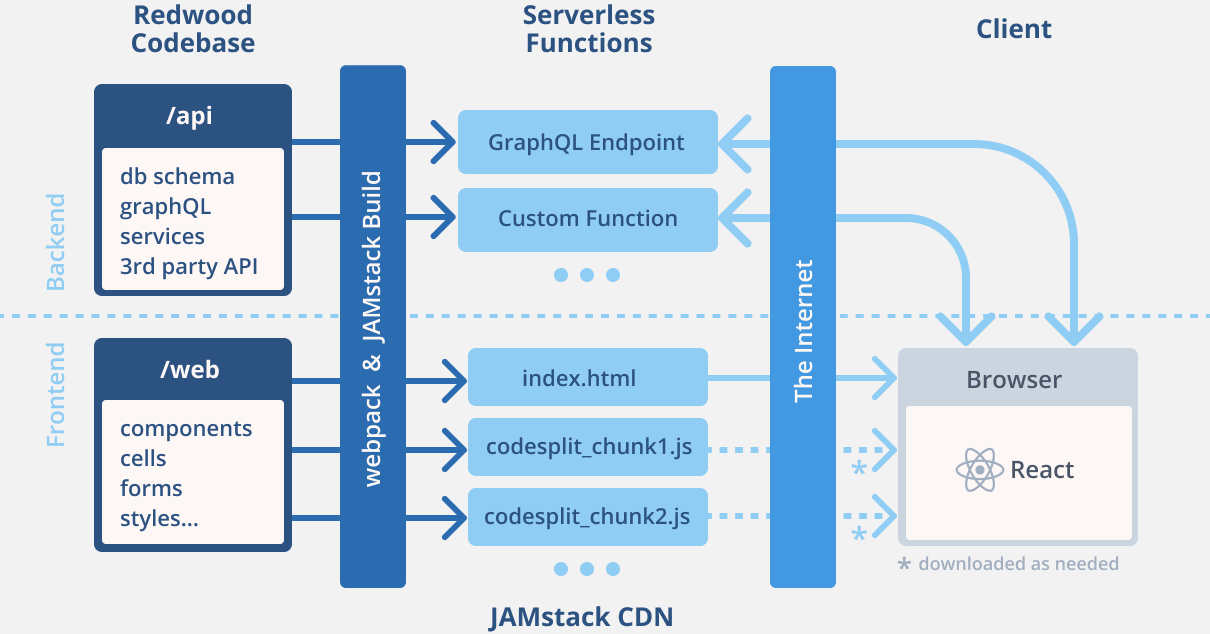
RedwoodJS is an opinionated, full-stack, serverless web application framework for developing and deploying Jamstack (Javascript, APIs and markup) applications.
- 💬 opinionated: Redwood uses React for the web frontend, GraphQL to interact with your backend, and Prisma on top of your database. Besides that, Redwood has its own conventions and app structure, with the web frontend and the backend code living in a monorepo.
- 🥞 full-stack: You probably guessed it from the previous point, but Redwood allows you to write web client and API code in a single project.
- ☁ serverless: The backend code runs on serverless functions (for example, AWS Lambdas), although nothing is stopping you from using third-party APIs.
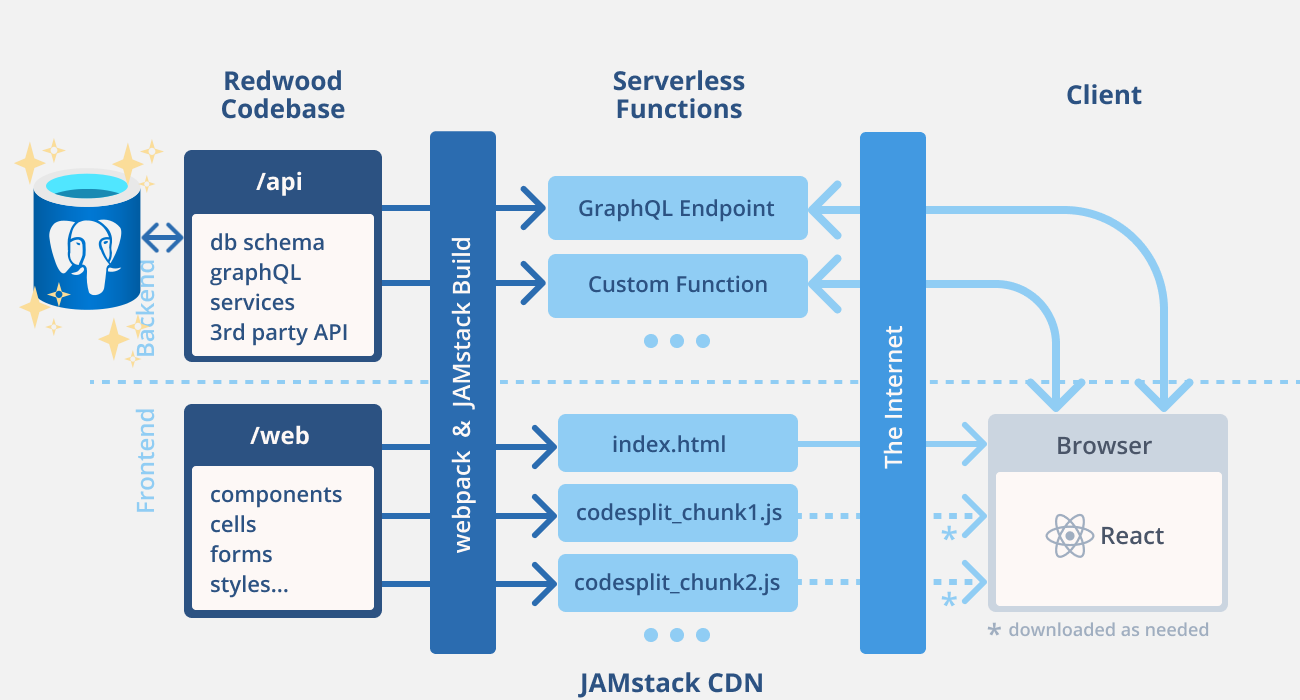
If you’re more of a diagram person RedwoodJS looks like this (taken from the homepage):

All your database are belong to us
So far so good. All was well, so I merrily followed the tutorial, until I reached the database section:
The Database
We’ll need a database somewhere on the internet to store our data. We’ve been using SQLite locally, but that’s a file-based store meant for single-user. SQLite isn’t really suited for the kind of connection and concurrency requirements a production website will require. For this part of this tutorial, we will use Postgres.
At which point I was like, hold on, why would I set up something on Heroku when I already have an Azure subscription? There’s probably a Postgres DB service offered somewhere, no?
Turns out, there is (gasp), it’s the Azure Database for PostgreSQL service.
I know these are famous last words, but really, it doesn’t take that much time. It’s also straightforward enough that I could do it without any pre-existing PostgreSQL—and to some extent Azure—knowledge.

Diving in
Steps outline
Here’s a quick rundown of all the steps involved:
- Make sure you have the prerequisites within reach
- Create and configure the resource on Azure
- Set up the database
- Pass the connection string to the deploy target
So let’s get started, and plug a Postgres database hosted on Azure into our Redwood app ⚡
Prerequisites
- An Azure subscription (you can get a free one here)
- A deploy target for your API that’s already set up and waiting for the database connection string (here we’re following the deployment section of the tutorial and using Netlify)
- Optional:
Ready? Let’s go!
Create and configure the resource
The Azure docs have multiple quickstart guides on how to create an Azure Database for PostgreSQL server on Azure:
- via the Azure portal,
- the Azure CLI in Azure Cloud Shell (in the portal or on https://shell.azure.com/),
- a local install of the Azure CLI,
- PowerShell (did you know that there is a cross-platform implementation of PowerShell?),
- or an Azure Resource Management template.
tl;dr: SO. MANY. OPTIONS. 😵
Feel free to pick whichever route you find easiest, but for this step I will describe how to click your way through the Azure portal:
- On the Azure Portal, choose Azure Database for PostgreSQL servers from the list of all services, and then Add.
- Configure your service details, with 2 important points:
- I highly recommend you review the Compute + storage section, and tweak your server configuration in there (storage, number of cores, redundancy). The pre-selected option is “General Purpose” which is not the cheapest one, so if you’re not planning on doing anything serious with your database I would say switch to the “Basic” option.
- Remember your admin credentials, you will need them further down.
- Set up additional settings if you know what you’re doing, and then review + create your server.
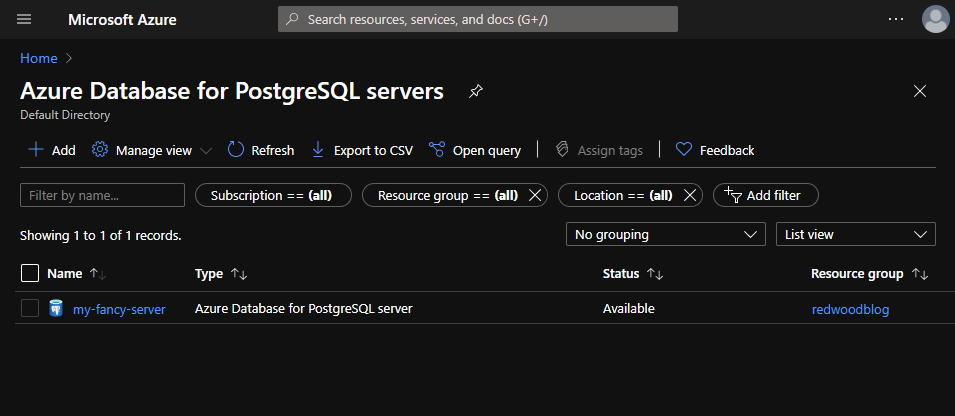
Server creation will take a couple of minutes. Once that’s done you should see something similar to this in the Azure Database for PostgreSQL servers dashboard:

Once that’s done we need to allow all incoming connections.
🤔 Waiiiiit a minute. Why do we need to do that?
Well, it depends on the deploy target. For example if we deploy on Netlify, the IP address of the deployed website changes for each deploy, and they don’t have a public IP range that can be whitelisted (see this thread and that answer). The easiest way to move past this hurdle is to allow all IPs.Of course, skip this step and use specific firewall rules if you know the IP addresses or ranges of the machines that will connect to your database.
In order to allow all incoming connections, click on the server name and go to the Connection security settings, click on Add 0.0.0.0 - 255.255.255.255, and continue past the warning:

This should add an AllowAll firewall rule with a timestamp—something like AllowAll_2020-9-19_17-6-6—and then save your changes 💾.
Set up the database
In the previous section we created an Azure Database for PostgreSQL server, which comes with an empty database called postgres by default. It’s pretty handy but we won’t use it, instead we’ll create our own redwood database.
For that we will roughly follow the relevant section of the quickstart guide, still through the Azure Portal:
- Open the Azure Cloud Shell by clicking on the terminal-looking icon on right side of the search bar
- Connect to your database via
psql, using the emptypostgresdatabase and the admin credentials you set up when when you created the server. The command will look like this:
psql --set=sslmode=require --host=<myservername>.postgres.database.azure.com --port=5432 --username=<myadmin>@<myservername> --dbname=postgres
Replace all fields accordingly, and you should end up with something similar to this once authenticated:

💡 Astute observers will notice that this connection command differs slightly from the one in the quickstart guide. Indeed, we had to add
--set=sslmode=requirebecause SSL connections are required (gasp2). You can modify this setting for your server by going to your server dashboard > Connection Security > SSL settings > Enforce SSL connection.
Now that we’re in, let’s create a separate redwood database, and switch connections to this newly created database:
postgres=> CREATE DATABASE redwood;
postgres=> \c redwood
Optionally, you can also follow this guide to create user accounts on the database.
When you’re happy with the result and ready to move on, type \q or exit to close the psql connection.
Setup time is now over, we’re almost done!
Pass the connection string to the deploy target
The deployment target will need a connection URI in order to be able to connect to your database. The URI will look like this:
postgresql://<myuser>%40<myservername>:<mypassword>@<myservername>.postgres.database.azure.com:5432/redwood
📋 A couple of notes here:
- The
%40is just an encoded@- Replace
redwoodat the end with the name of your database if you decided to go rogue- Remember to encode special characters in your password, for example with URL encoder
👉 Double-check whether the resulting URI is correct by using it to connect to your database using psql, either locally or via the Azure Cloud Shell:
psql "<URI almost too long to be a tweet>" # Note the quotes
Now that we have the magic key connection URI, use it however the deployment target needs it. If you’re still following the RedwoodJS tutorial and deploying on Netlify, this connection string will go in the DATABASE_URL environment variable. The RedwoodJS tutorial also recommends appending ?connection_limit=1 to the connection URI, so do that too.
And that’s it, you just linked your RedwoodJS app to a PostgreSQL database hosted on Azure 👏👏 Since this is a very basic integration, I didn’t worry about connection pooling or user management.
There are some links below for your perusal, and with that, I bid you farewell, mighty adventurer. Stay safe!
Links
- Jamstack: https://jamstack.org
- RedwoodJS home: https://redwoodjs.com
- RedwoodJS repo: https://github.com/redwoodjs/redwood
- RedwoodJS forum: https://community.redwoodjs.com
- Azure Database for PostgreSQL home: https://azure.microsoft.com/en-ca/services/postgresql
- Free Azure account: https://azure.microsoft.com/free